Macro Fly Photography - A Process

Moderators: William Anderson, letumgo

User avatar
William Anderson
Site Admin
Posts: 4569
Joined: Mon Feb 23, 2009 3:14 pm
Location: Ashburn, VA 20148
Contact:

Re: Macro Fly Photography - A Process

Post by William Anderson » Sun May 31, 2015 8:58 am

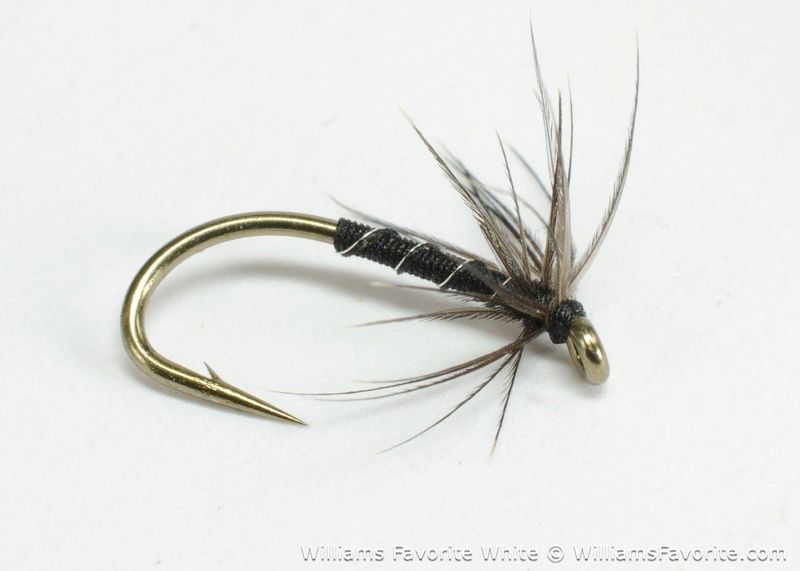
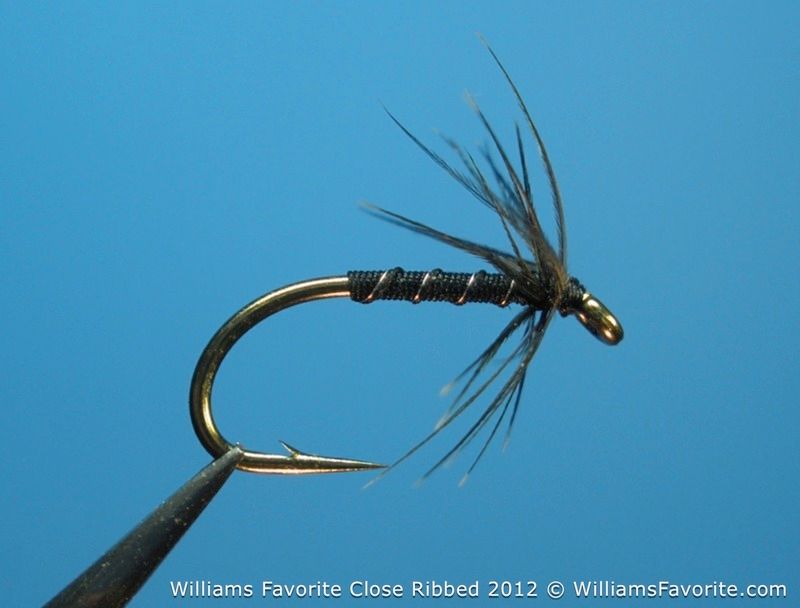
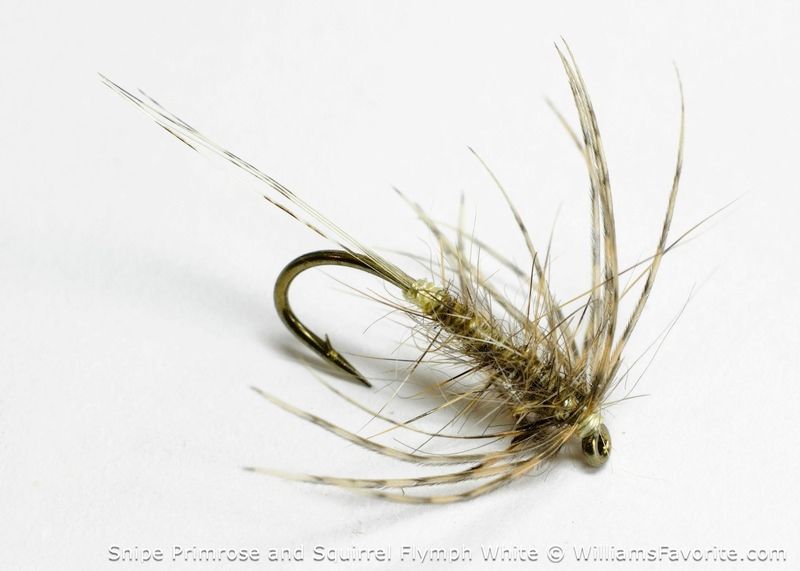
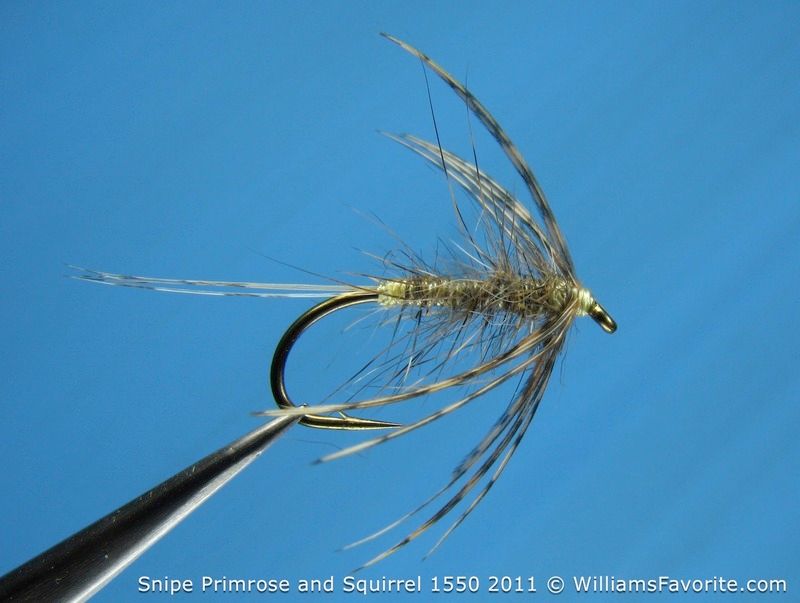
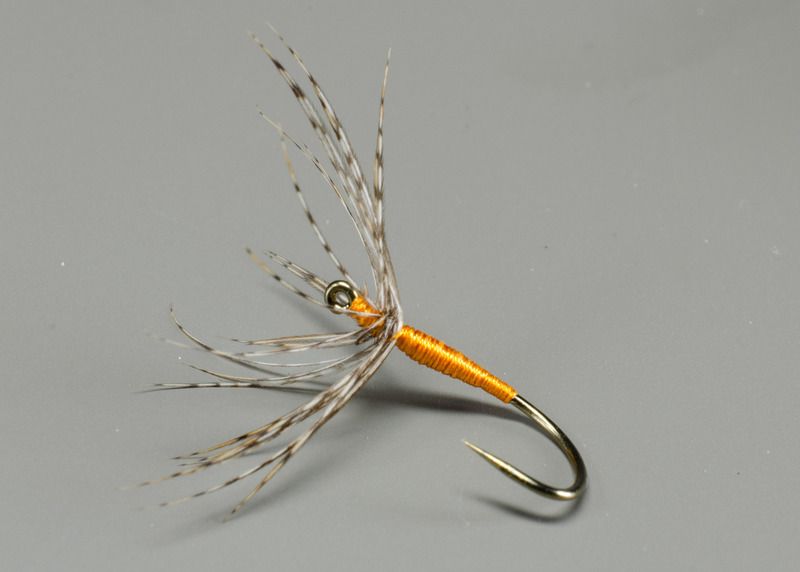
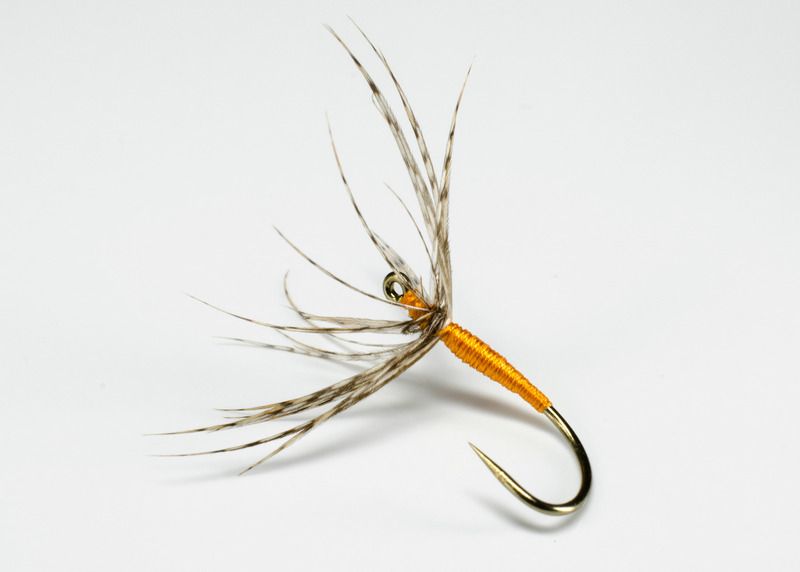
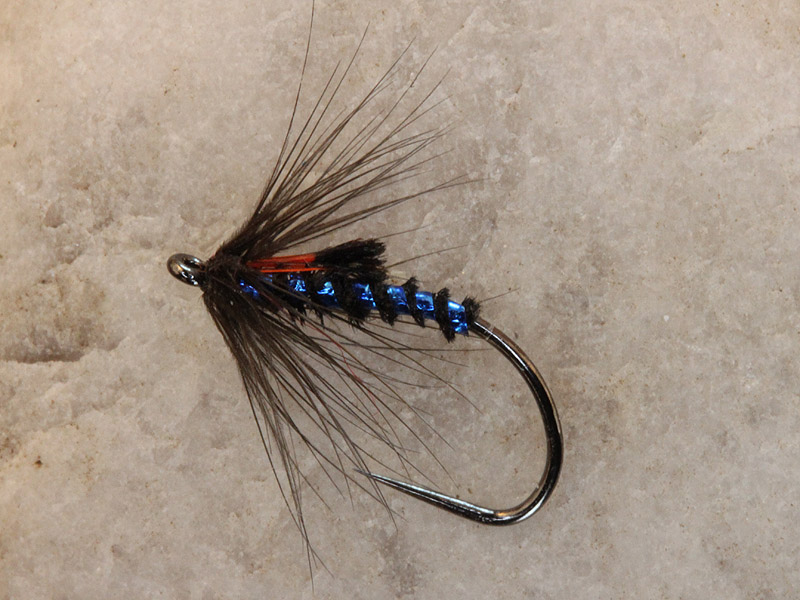
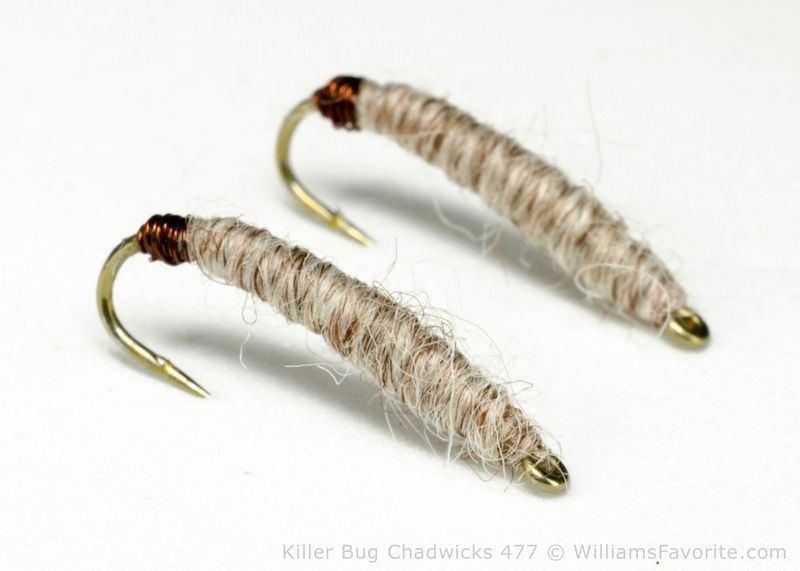
One of my main objectives is continuity and I'm hoping to arrive at something that is easy to reproduce with a range of flies. I've only had a bit of success shooting one a white background but when it works it really looks great. They are sterile shots, removed from context and perhaps cold in comparison to the stone, but I can't help but appreciate the appeal.

Williams Favorite 2015
Image

Williams Favorite 2012
Image

Snipe Primrose and Squirrel Flymph 2015
Image

Snipe Primrose and Squirrel Flymph 2011
Image

I'm not certain anything is really gained, but the white background is fresh.
"A man should not try to eliminate his complexes, but rather come into accord with them. They are ultimately what directs his conduct in the world." Sigmund Freud.
www.WilliamsFavorite.com
User avatar
letumgo
Site Admin
Posts: 13346
Joined: Sat Feb 21, 2009 7:55 pm
Location: Buffalo, New York
Contact:

Re: Macro Fly Photography - A Process

Post by letumgo » Sun May 31, 2015 9:43 am

I find the white and black backgrounds to be very difficult to get the right exposure. I would be interested to hear anyones suggestions for how to consistently get results with these color backgrounds.

The white background is very compelling for graphical layouts. I like how you can see more of the underbody thru the dubbing.
Ray (letumgo)----<°))))))><
http://www.flytyingforum.com/index.php? ... er=letumgo

"The world is perfect. Appreciate the details." - Dean
User avatar
Hans Weilenmann
Posts: 2109
Joined: Mon Feb 23, 2009 8:45 pm
Location: Amstelveen, The Netherlands
Contact:

Re: Macro Fly Photography - A Process

Post by Hans Weilenmann » Sun May 31, 2015 10:20 am

Thanks William for nudging me to participate in this thread ;-)

Macro photography is a many faceted area - and when it comes to (artificial) fly photography there is no one right path. (Is there ever? LOL)

There is one right question to ask, though.

What am I trying to achieve? Or, put another way - what is the puzzle I need to find a solution for? How do I want the fly to show?

Quantifying and clarifying the need will govern to a major extent how the approach will be, what may be suitable light, tools and props.

In my case, for Flytier’s Page and general web based use - I decided on a documentary style representation with total focus on the fly - a well lit, pretty stark image. I also needed the setup to be repeatable, the results predictable - and minimal post-processing. The result is what to many may be a boring image, but at the same time a very functional image - showcasing the pattern, the techniques and materials used. Ideally a photo which tells the entire story of how the tier combined techniques and materials - all in one still image.

What my typical fly images are NOT is an artistic, and ‘artsy’, representation. There is no mood or subjectivity to them - what you see is what you get.

The above paragraphs set the scene - and drove my choice of lighting, my choice of camera/lens, my background selection and even the clips I use to hold the fly.

These results, these image, may however not be the look you are after - so the remainder of this post will be (mostly) more generic - and simply/only my take on the subject. YMMV ;-)

How do I spell macro photography? C-O-N-T-R-O-L.

Macro photography is for me defined by seven principal criteria:

Lighting
Color reproduction
Magnification
File format
Output medium and size
Depth of Field (DoF)
Post Processing

Lighting:

Without adequate and quality of light the game is over before it starts. Light sources are manyfold - both natural and artificial - and YOU want to be, no need to be, the party in control. For our subject of fly photography to me this translates to artificial light. I simply cannot be held hostage to when natural light is playing nice. Use lamps.

Next decide on the amount, and the quality. The amount of light needed depends on what kind of result you are after - you be the judge. The quality of the light - direction, balance and temperature - steer the result in a major way.

Color reproduction:

Lamps used will have a specific color temperature. Manual white balance setting is a must if one hopes to get accurate color reproduction.

That said - photographer today, with digital cameras and the (VERY recommended, if your camera supports it) shooting in raw, not jpg, is much less held hostage by light temperature at time of taking the shot. Post processing allows adjusting the colors, but getting it right in-camera is so very much simpler, and repeatable.

Magnification:

In order to get the fly to fill the frame, especially in the typical trout fly hook sizes, again there is the two stage approach - In camera and post processing. In my view the focus should be on the first - settle on a camera/lens combination which allows a magnification ratio to get the fly to fill (most of) the frame - rather than rely on a high megapixel sensor and aggressive cropping in the post processing stage.

File format:

There will almost always (read: always) be a need for a post processing step to optimise the image. Certainly one should/must strive to take the cleanest image at shooting time, but post processing software is part of a sensible workflow. I strongly recommend shooting in raw format if your camera has that ability. If not, then go for a lossless format such as tiff. The camera default of jpg immediately introduces loss of detail (it is a ‘lossy’ format). Once detail is lost, it is gone forever. But it does not end there - if the starting point is a jpg, then re-saving after post processing once again results in detail loss - compounded with each file save operation. I suggest you keep the file in a lossless format through all steps - on the in-camera memory card storage, and through the post processing steps - and only save a web ready version as the last step.

Output medium and size:

A key variable is required output medium and size.

If the output medium we need to cater for are paper prints, say a 10” by 15” or 12” by 15”, or high quality full screen display, then a pretty high rez image is required.

On the other hand, if the desired output is for use on web pages, the requirement changes. For my images on Flytier’s Page I downsize to 800 pixel on the long side. Note the word “downsize” - in megapixel terms this is a pretty low rez image. It is under 1mp - yet on a computer screen I like to think they look pretty decent.

Any camera out there, any smartphone out there, will record images at much higher resolution. So if web use is your target, worry not about seeking to use the highest resolution camera - focus on capturing the best quality image by paying attention to the lighting and the general close up capabilities, file format recording, the quality of the lens and the post processing steps.

In my case - as William mentioned - Flytier Page images, and also the fly images I post on Flymph, are shot with a very humble and quite dated 3mp point&shoot, a Nikon CoolPix 995. Introduced in 2001, this camera is now almost a decade and a half old, or a ‘century’ ago in digital camera terms - yes it is my ‘weapon of choice’ still today. It ticks all my boxes for this niche called fly photography for web use - especially the next one, which is...

Depth of Field (DoF):

Fishing flies are very much 3-D objects and as such they are a major challenge to photograph up close. Achieving sufficient DoF to get all the visible parts of a fly in focus - that is where it gets interesting. It is also where fundamental decisions need to be made on camera sensor and lens selection.

A number of variables come into play - each influencing the DoF outcome. Effective focal length, aperture, sensor size - and post processing crop. There is also an often overlooked tie-in with the previous item on my list, output medium and size. For a 800 by 533 pixel image (I shoot the web page images in a traditional 3:2 format - a legacy from my 35mm film days) I need a clean and detailed source file, I do not require a double digit mp capable sensor.

What I do need is as much DoF as I can muster so all the components of the visible part of the fly are in focus.

*note* The focus stacking approach of course is another avenue to get mind blowing DoF by slicing/combining a string of images. It is not an approach which I find works for me.

Post Processing:

My post processing is an integral part of my generic photography workflow - and it typically involves importing raw files into Adobe Lightroom.

However, this is not the case with my fly photography. Here the aim to have as clean and complete an image out of the camera - after all I have full control over the photography step. I have control over my subject, the background, the lighting - there is where I tweak these aspects. I want as little as possible to do to the image once it has been captured, as little post processing as I can manage.

The post processing takes place in Adobe Photoshop - simply because I have the program available - but in fact I could easily achieve the same result with any of a number of no/low cost freeware or shareware programs. I start with a clean image, properly exposed, colors accurate - there may be an errant finer or strand to clone away (this is where a bland/even background is a huge asset) - but other than that post processing involves nothing more than a mild sharpen, an image reduction to 800 pixels on the long side of the image, and an export to jpg format. Job done.

---

There may not be one right way, but there is a right way for me.

While I use larger double digit mp sensor bodies, with high end glass, for most of my photography, including close-up work, with the combination of these larger sensors, longer focal length macro lenses and aperture sweet spots I struggle/fail to achieve the results to match or surpass the mighty mouse-that-roared CP995 ;-)

Its combination of a puny 1/2.3” sensor, a small aperture (I can tweak f10.2 out of the CP995), a short focal length lens, from a camera equipped with good quality glass and able to focus adequately close, delivers sterling DoF out of the box. Minimal post processing of the tiff in Photoshop rounds off my workflow.

Works for me ;-)

Cheers,
Hans W
User avatar
William Anderson
Site Admin
Posts: 4569
Joined: Mon Feb 23, 2009 3:14 pm
Location: Ashburn, VA 20148
Contact:

Re: Macro Fly Photography - A Process

Post by William Anderson » Mon Jun 01, 2015 9:41 am

Hans, I really appreciate the time and thought you've put into this post. Thank you. It seems like the clear conclusion to dozens of conversations we've had over the years and reminds me of all those very early "a-ha" moments when you were describing what it was you were working toward and how. I knew immediately that your logic was sound and I wanted to keep the simplicity and clarity as a primary objective. The minimum post production and repeatability were exactly the path I was looking for. In many ways it still is and I hope that this exercise will actually make sharing flies simpler even while I continue to experiment. Your principles on control apply to your tying as well as the photographs and I took those lessons to heart.

There is so much solid information listed above I wanted to respond to each part as a way of helping me to define what I'm doing, but doing it in one post isn't going to work. It will have to unfold and I'll be able to point back to aspects that govern how I grow in this area. I have been wanting to write up a post of "what I've learned", but it would be premature at this point. So I'll keep working and posting and as everyone's patience for this starts to fall away I might just be doing it for myself. Which is fine. You'll see my results in the other sections. :D

I will say my goal is nearly the same, a simple documentation but I want to do that while at the same time explore presenting the flies out of the vise and off the clamp. The clamp is easier and the results are more predictable, but if I can manage to offer an image that is as descriptive as those locked in the clamp, I'm going to try.

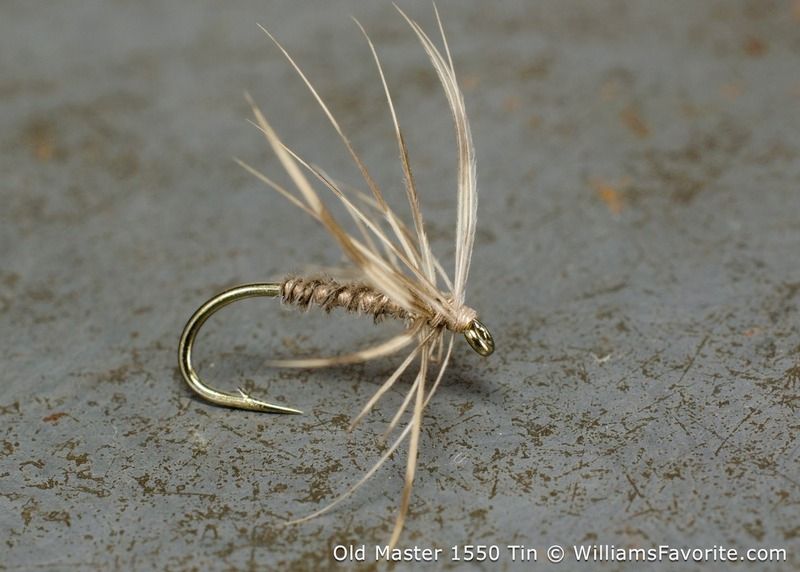
The shots on the stone, or other bases are fantastic, as many of you do them very well and they leave an impression that brings the flies to a stronger association to the stream and less alienated. But for myself, they also offer additional information that can interfere. That balance is going to be an ongoing compromise. This Old Master on the old tin can is warmer and in some ways relieves the eye from the starkness of the fly on it's own, but it also obscures the information in a way that doesn't quite work for this shot. It may be an ideal solution for another pattern. Something with bright, translucent materials that refuses to be photographed on a museum like white surrounding.

Image


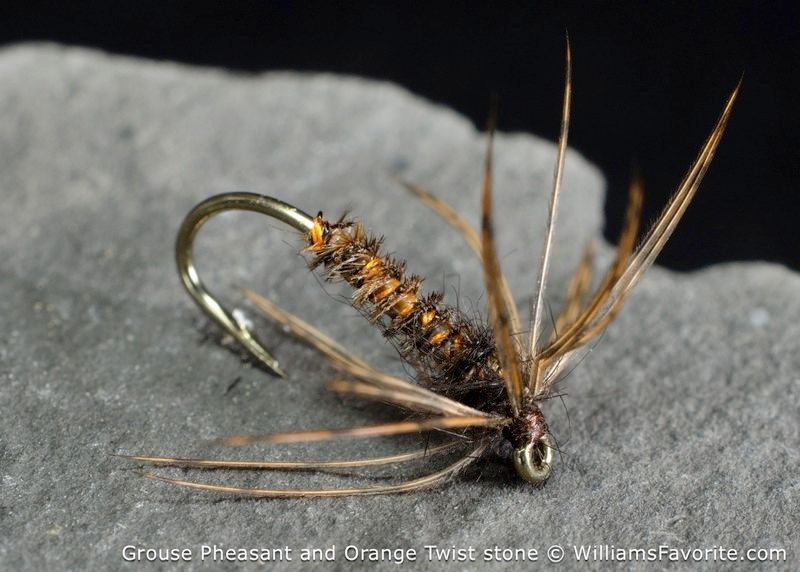
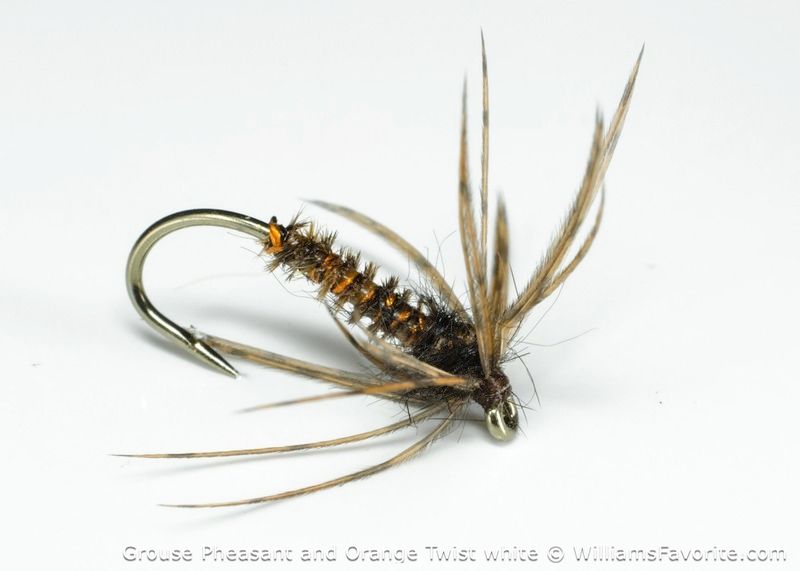
And this Grouse Pheasant and Orange Twist pattern is actually eased a bit by the stone where it is almost too severe, or inelegant to be presented in museum white. There clearly isn't a solution that works for every fly (except the blue in the vise, that always works ;) ).

Image


Image


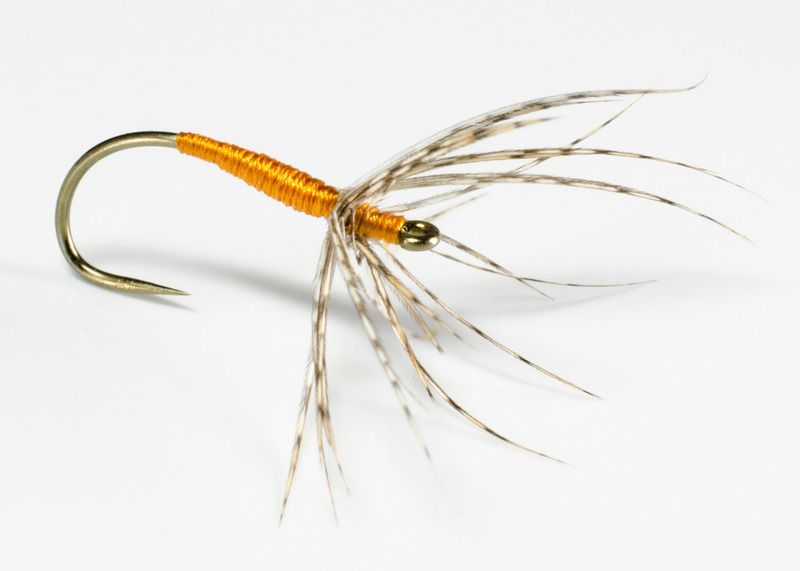
However, there are patterns that seem to present better with all distraction and extra information stripped away. This Partridge and Orange Kebari is one of my favorites to date.

Image


This pattern didn't have an issue, but others with brighter translucent material might work on a background like this where white simply will not be possible. Shooting to a small range of gray scales might be acceptable for my site, but a host of experiments just won't work. I'll have to keep fooling with the options and just accept that continuity might come in shades of gray (not 50, more like...5 :D ).

Image


But given the chance, I really like the way these white images offer something different without compromising the documentation.

Image

Process to be continued.

w
"A man should not try to eliminate his complexes, but rather come into accord with them. They are ultimately what directs his conduct in the world." Sigmund Freud.
www.WilliamsFavorite.com
User avatar
hankaye
Posts: 6582
Joined: Tue Jun 08, 2010 4:59 pm
Location: Arrey, N.M. aka 32°52'37.63"N, 107°18'54.18"W

Re: Macro Fly Photography - A Process

Post by hankaye » Mon Jun 01, 2015 10:06 am

dub-ya, Howdy;

Watching you grapple with you OCD while refining your photographic skills
is almost worthy of a spectator sport. I mean that in a good way. If it weren't
in the morning I'd pop a bag of popcorn and grab a good seat in the bleachers.
As it is the morning I ensure that the coffee cup is full, Rascal is out on his spot
so he can tick off the cats and prospectors on his clipboard (which/who is in
the Park and who isn't), so I won't be distracted. There truly is an enormous
amount of information being dished out with each posting (except for this one),
Looking forward to following the rest of the journey. ;)

hank
Striving for a less complicated life since 1949...
"Every day I beat my own previous record for number
of consecutive days I've stayed alive." George Carlin
User avatar
Hans Weilenmann
Posts: 2109
Joined: Mon Feb 23, 2009 8:45 pm
Location: Amstelveen, The Netherlands
Contact:

Re: Macro Fly Photography - A Process

Post by Hans Weilenmann » Mon Jun 01, 2015 10:13 am

William,

As you appreciate there is quite a difference to photographing a single fly, in a pleasing to the eye setting, versus photographing a dozen or more flies, which may cover a range of hook sizes and almost certainly incorporate very different colors and textures.

Here is a single fly placed on a stone:

Image

While I a happy enough with the shot, I am also aware of aspects which limit the appeal (to me). The absence of any backlighting is but one of them.

A background can be immediately behind the fly, or there can be space (inch or more) between the fly and the background.

A fly placed directly onto a background either has to be lying in a horizontal plane, or it has to be somehow fixed to the background. The first places limitations - not all flies are 'flat', near 2-dimensional. Try photographing any hackled dry and this soon becomes obvious 8-) Most flies photograph best viewed from the side - we as tiers/anglers are educated to see flies from that angle, by and large. Again, a challenge to photograph. Thirdly/fourthly, photographing looking down onto the fly and getting the fly properly lit offer their own challenges.

Fixing the fly to a vertical background - I am not even going there 8-)

Ok, what about a fly separated from the background? Well, one approach is to have the fly resting on something transparent, maybe clear glass - and then battle the reflections which enter the fray. Suspending from wire of some description, and then brushing this away in post processing? Hmmm, really worth it?

Best of success on your journey, and I for one am keen to follow your findings and progress.

Cheers,
Hans W
User avatar
Hans Weilenmann
Posts: 2109
Joined: Mon Feb 23, 2009 8:45 pm
Location: Amstelveen, The Netherlands
Contact:

Re: Macro Fly Photography - A Process

Post by Hans Weilenmann » Mon Jun 01, 2015 10:35 am

hankaye wrote:Watching you grapple with you OCD while refining your photographic skills
is almost worthy of a spectator sport.
*chuckle*

Call it what you wish - I call it PCS (pragmatic common sense) :lol:

Cheers,
Hans W
User avatar
William Anderson
Site Admin
Posts: 4569
Joined: Mon Feb 23, 2009 3:14 pm
Location: Ashburn, VA 20148
Contact:

Re: Macro Fly Photography - A Process

Post by William Anderson » Mon Jun 01, 2015 11:13 am

Hank..so glad to hear you're being entertained. :D I do what I can.

Hans, your point is not lost on me regarding the requirement to shoot dozens....or maybe even almost 5000 different flies, tones colors, sizes, hooks shapes, etc. Even the weight of some of the flies you shoot is a factor. Fortunately, I've given myself some buffers but shooting almost entirely soft-hackles or spiders, the occasional nymph and emerger and rarely a dry, so for the most part I can shoot a fly tied in the round, which allows the posture to shift and it's still a legible image. I also tie and photograph small flies, rarely over a #12. Of the hundreds of images I've taken, I far and away favor shooting these flies to share here.

The flies shot flat seem lifeless in a way that doesn't really make any sense, but when comparing the images, it's just a reaction. Like the Williams Favorite at the top of this page, looks like it just gave up and fell over. :D Your shot above on the brighter stone works better than most but the lack of backlight is a problem, even in reading the materials accurately. I know what they are and infer their tone and texture, but it's very hard to get an accurate read this way. It's not an easy thing, which is why when you see someone who has worked it out as you have, it's a pleasure to borrow on your success. Lots of folks are doing a wonderful job, probably do to the inherent challenge, brings out the problem solver in each of us, not to mention the generosity of those who have solved many of the issues. Sharing the process in photographing these flies is just an extension of sharing the flies themselves and I do hope everyone gets some benefit from this entire thread.

Soon to follow I would like to do a series of posts on the set up, lighting, props, etc. By the way, the last shots of the Partridge and Orange Kebari were shot with a 40mm macro lens and a 12mm extension tube. I'm not sure I gained much, but maybe and I'll definitely have to take some time shooting with the tubes to learn their value.
"A man should not try to eliminate his complexes, but rather come into accord with them. They are ultimately what directs his conduct in the world." Sigmund Freud.
www.WilliamsFavorite.com
User avatar
gingerdun
Posts: 1660
Joined: Mon Jan 09, 2012 10:00 pm
Location: Merrimac, Massachusetts

Re: Macro Fly Photography - A Process

Post by gingerdun » Mon Jun 01, 2015 5:59 pm

Hi William,

I agree with you, the first Partridge and Orange Kebari is excellent in every way.
The downside of that technique is that not all flies will sit as perfectly as this one did.
Getting rid of the rectangle frame is nice when placing the photograph on a white page or screen.
The Depth of Field and sharpness seem outstanding.

Hans—thanks for your insightful comments. Great post.

Lance
User avatar
William Anderson
Site Admin
Posts: 4569
Joined: Mon Feb 23, 2009 3:14 pm
Location: Ashburn, VA 20148
Contact:

Re: Macro Fly Photography - A Process

Post by William Anderson » Tue Jun 02, 2015 1:09 pm

How long til this happened? :D

Image
"A man should not try to eliminate his complexes, but rather come into accord with them. They are ultimately what directs his conduct in the world." Sigmund Freud.
www.WilliamsFavorite.com
Post Reply