mounting flies in shadow boxes, frames, etc
Moderators: William Anderson, letumgo
mounting flies in shadow boxes, frames, etc
Guys...anyone know a simple way to mount flies so that they can be put into a frame, or shadow box.
Youtube is woefully lacking in DIY instruction...
Carl, I know about your card box displays...but the glue dots don't really work for what I want to do..
Youtube is woefully lacking in DIY instruction...
Carl, I know about your card box displays...but the glue dots don't really work for what I want to do..
Re: mounting flies in shadow boxes, frames, etc
It may not do what you want and I don't recall where I saw it, so...
fine soft wire such as in bag tie
toothpicks or short stiff wires
stiff card stock size of display box
punch hole at each location that a fly will sit
pass both ends of a 2" wire through the hole
pass hook point through the loop formed in the wire
pull wire tight on back side and secure around a tooth pick or similar
This draws the hook against the card, card will be the bottom/back of display but could be covered with felt etc. prior to mounting the wires. Angle and attitude of fly relative to card stock should be adjustable.
Another thing I saw, was to mount cut match sticks on a thin sheet of wood and set the hook points in the matchstick peg. I think corks could sub for the matches.
Haven't seen this but it just occurred to me that the wire from a bag tie could be bent round the hook a couple times and the two tags twisted tightly making a standoff leg that could be mounted in several ways.
- Ron Eagle Elk
- Posts: 2818
- Joined: Sun Feb 22, 2009 12:33 am
- Location: Carmel, Maine
Re: mounting flies in shadow boxes, frames, etc
A friend in WA used to raid his wife's beading supplies for long beads (proper name is bugle beads). He would pass this wire through the bead, forming a loop. The fly hook was put in the loop and the tag ends were put through a hole in the matte board backing. There was some stand-off for the fly hackle, and if he used clear beads it looked really good. For heavy flies, like steelhead and Atlantic Salmon flies, he used two beads and wires per fly.
"A man may smile and bid you hale yet curse you to the devil, but when a good dog wags his tail he is always on the level"
- Ron Eagle Elk
- Posts: 2818
- Joined: Sun Feb 22, 2009 12:33 am
- Location: Carmel, Maine
Re: mounting flies in shadow boxes, frames, etc
Welcome, Sir.
"A man may smile and bid you hale yet curse you to the devil, but when a good dog wags his tail he is always on the level"
Re: mounting flies in shadow boxes, frames, etc
very extensive tutorial but may give other iseas
http://hatchesmagazine.com/blogs/Hatche ... hadow-box/
http://hatchesmagazine.com/blogs/Hatche ... hadow-box/
Flytiers sure have a way at making things difficult
Re: mounting flies in shadow boxes, frames, etc
Norm.. thanks for the link..I'd seen that one and certainly is thorough and professional. I'm still tinkering with the right method. I'm doing this strictly for myself and don't plan for any outside viewing, so I'm looking for simple, stupid, ways which fits me perfectly. Thanks for the response. And by the way, your flies are amazing..
- letumgo
- Site Admin
- Posts: 13346
- Joined: Sat Feb 21, 2009 7:55 pm
- Location: Buffalo, New York
- Contact:
Re: mounting flies in shadow boxes, frames, etc
Ron,
I played around with mounting one of my recent fly patterns (Black Caddis), along with the materials used to create the fly. I've seen some old mounts with a similar idea, where the materials are given equal billing with the fly pattern itself. This also gave me an opportunity to play around with a new set of watercolors (I honestly have no artistic talent, but can't resist learning something new... It's like grade school art class. Simple joy in pretty colors, and I'm a sucker for any excuse to play in water.
 ).
).
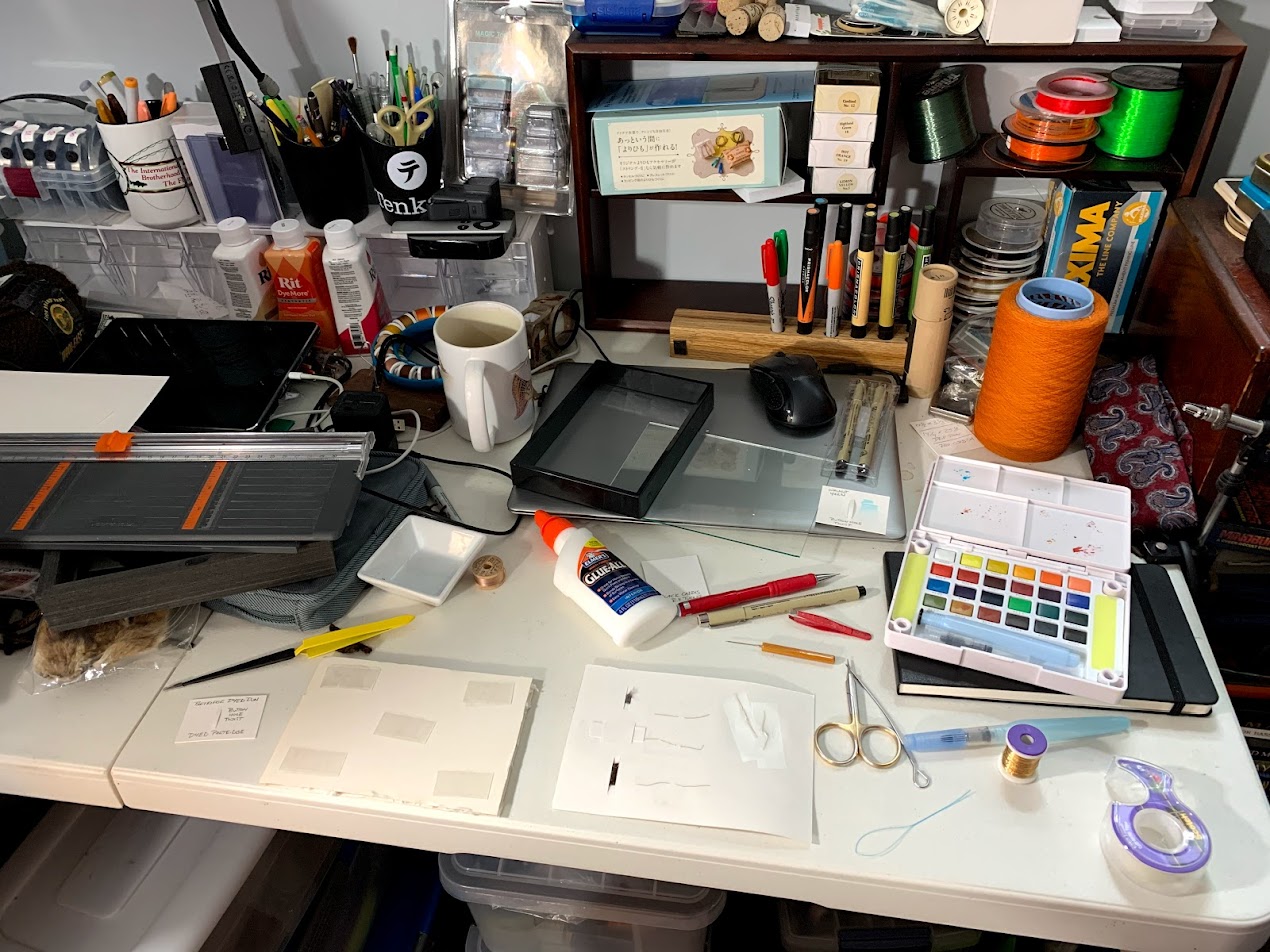
The materials are mounted on heavy weight watercolor paper (nice bright background; nice stiffness/rigidity; nice texture; suitable for further enhancement/painting). I used a paper cutter, scissors, bodkin, dental threader, fine copper wire to mount materials, clear Scotch tape and some water colors/artist pen/pencils).
The hard part was laying out the materials, to get things relatively evenly spaced. I started with small mounts of individual materials, which allowed me to move things arounds and try different layouts until I was happy.
Next I cut out a piece of watercolor paper, so it would fit inside the frame (edge-to-edge). Then figuring out where to make precise cuts in the paper, based on the layout. I have a cutter, which allows for smooth even cuts and fairly precise start/stops. Light pencil marks or needle indentations can help with part. You could also use a straight edge and sharp exacto knife to accomplish the cuts.
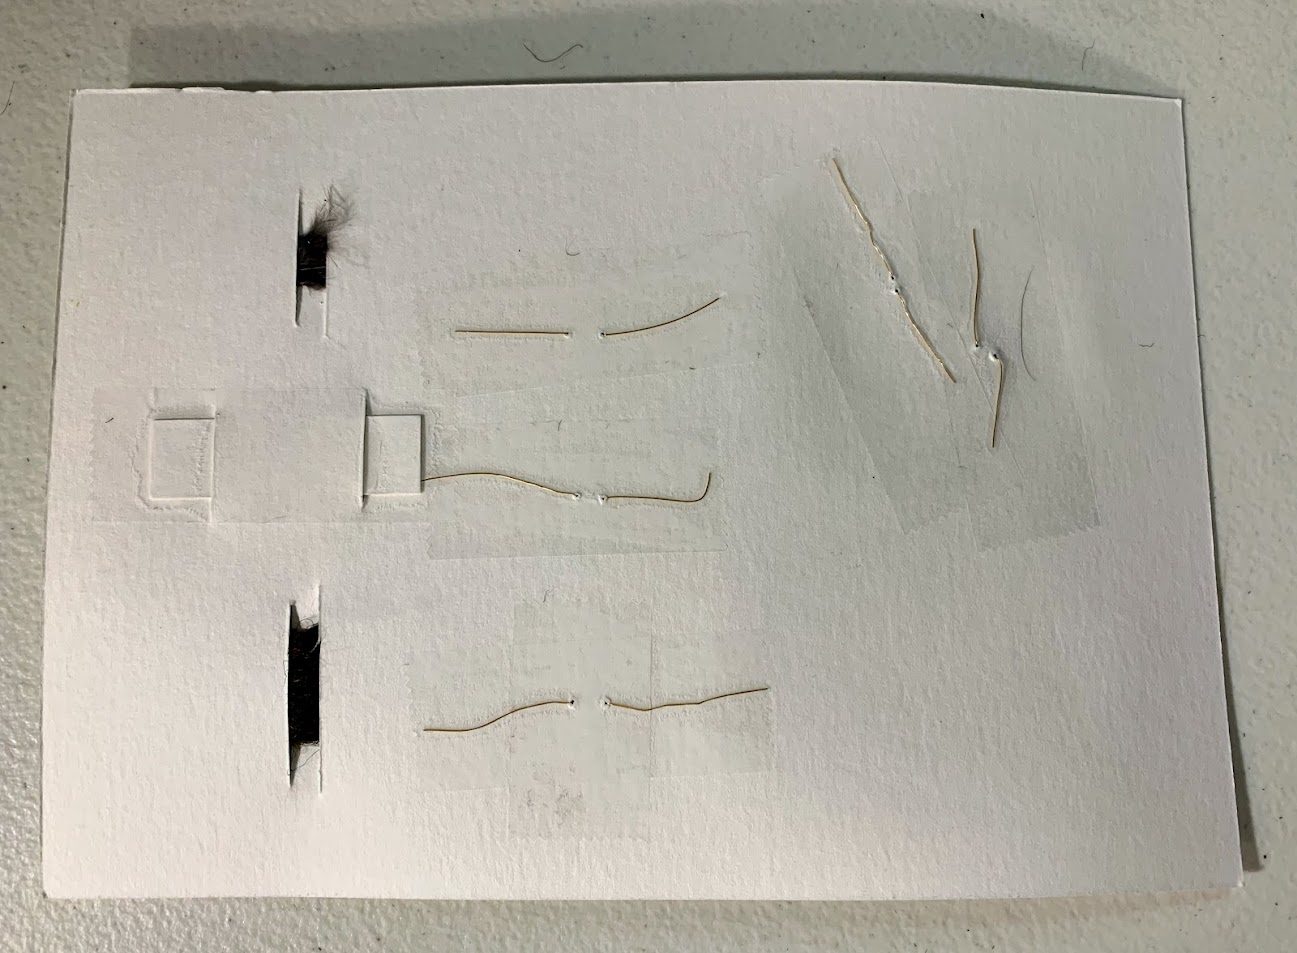
The fly and peacock herl are mounted with fine copper wire. The wire is inserted thru tiny holes in the paper (made with bodkin needle - then held in place with clear tape on the backside).
CRAFT TIME:


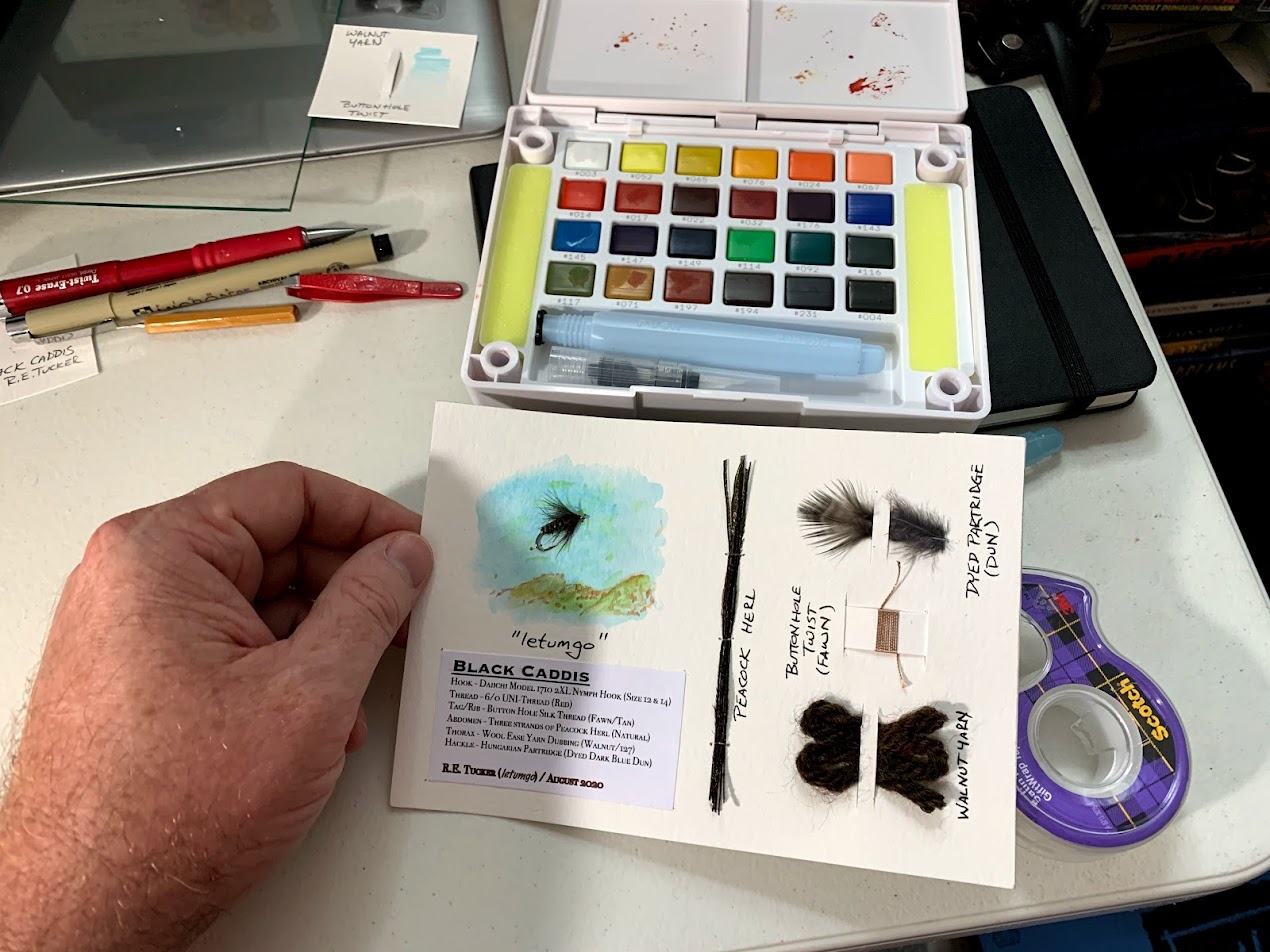
Close-up view of materials and fly mounted on the water color paper:

Backside of mounted materials:

Mount inserted into inner frame. A snug fit allows you to adjust the distance from the glass front.

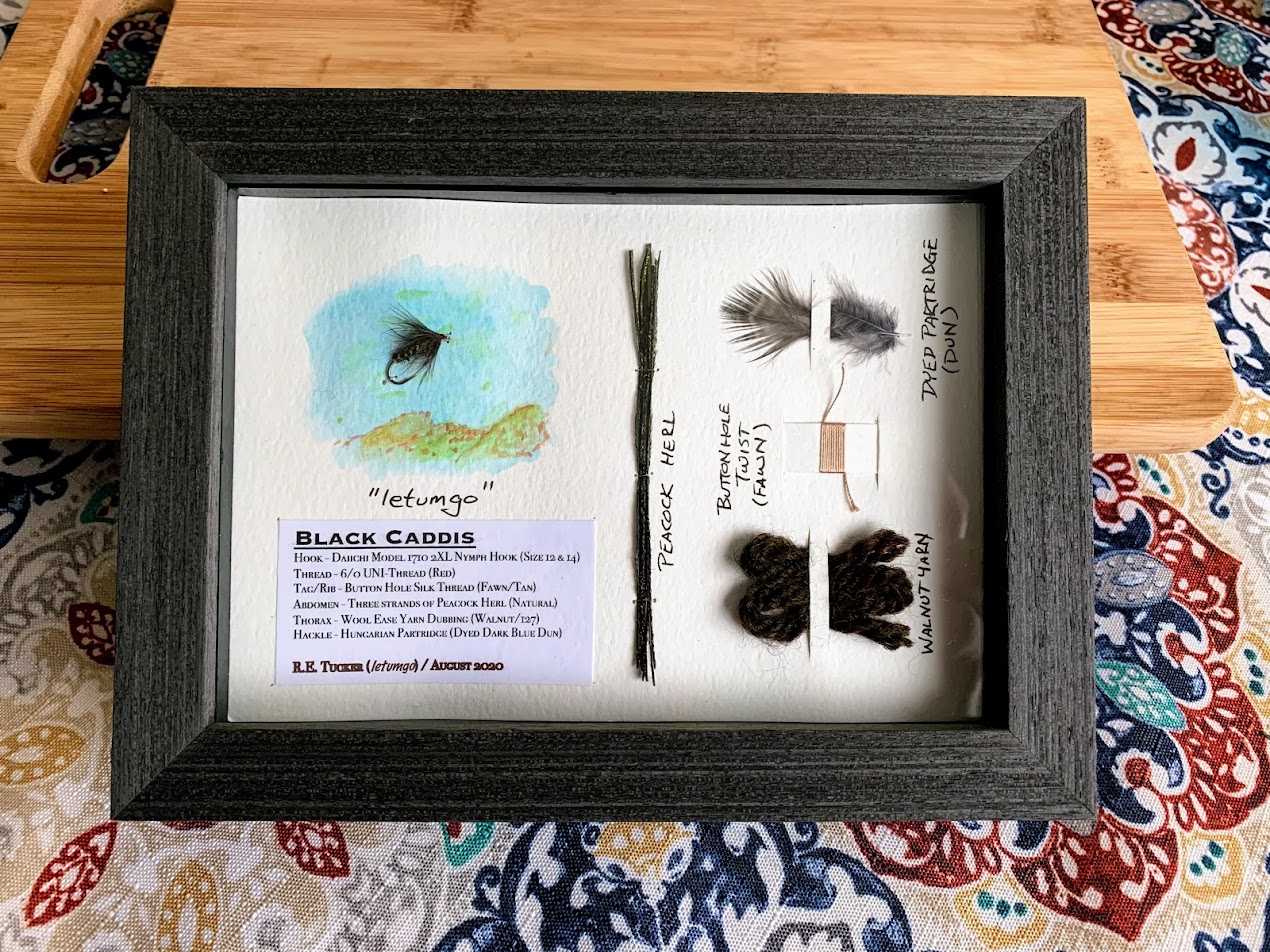
Finished frame with materials and fly.

I played around with mounting one of my recent fly patterns (Black Caddis), along with the materials used to create the fly. I've seen some old mounts with a similar idea, where the materials are given equal billing with the fly pattern itself. This also gave me an opportunity to play around with a new set of watercolors (I honestly have no artistic talent, but can't resist learning something new... It's like grade school art class. Simple joy in pretty colors, and I'm a sucker for any excuse to play in water.
The materials are mounted on heavy weight watercolor paper (nice bright background; nice stiffness/rigidity; nice texture; suitable for further enhancement/painting). I used a paper cutter, scissors, bodkin, dental threader, fine copper wire to mount materials, clear Scotch tape and some water colors/artist pen/pencils).
The hard part was laying out the materials, to get things relatively evenly spaced. I started with small mounts of individual materials, which allowed me to move things arounds and try different layouts until I was happy.
Next I cut out a piece of watercolor paper, so it would fit inside the frame (edge-to-edge). Then figuring out where to make precise cuts in the paper, based on the layout. I have a cutter, which allows for smooth even cuts and fairly precise start/stops. Light pencil marks or needle indentations can help with part. You could also use a straight edge and sharp exacto knife to accomplish the cuts.
The fly and peacock herl are mounted with fine copper wire. The wire is inserted thru tiny holes in the paper (made with bodkin needle - then held in place with clear tape on the backside).
CRAFT TIME:
Close-up view of materials and fly mounted on the water color paper:
Backside of mounted materials:
Mount inserted into inner frame. A snug fit allows you to adjust the distance from the glass front.
Finished frame with materials and fly.
Ray (letumgo)----<°))))))><
http://www.flytyingforum.com/index.php? ... er=letumgo
"The world is perfect. Appreciate the details." - Dean
http://www.flytyingforum.com/index.php? ... er=letumgo
"The world is perfect. Appreciate the details." - Dean
Re: mounting flies in shadow boxes, frames, etc
That is outstanding, Ray.
The watercolor gives it a unique look too.
I have a modest collection of some special flies I really should mount.
I noticed you used a frame with an insert that allows spacing between the matte and glass.
Is that something you made or did you find that in a craft store?
The watercolor gives it a unique look too.
I have a modest collection of some special flies I really should mount.
I noticed you used a frame with an insert that allows spacing between the matte and glass.
Is that something you made or did you find that in a craft store?
- letumgo
- Site Admin
- Posts: 13346
- Joined: Sat Feb 21, 2009 7:55 pm
- Location: Buffalo, New York
- Contact:
Re: mounting flies in shadow boxes, frames, etc
My wife found the frame for me at Walmart. It was a Christmas gift, which has sat on my desk for months while I thought of a project for it. I had time yesterday to just play, and this seemed like a nice craft project.
The frame has glass on both sides (front and back), with an inner frame to hold the glass appart. Ideally it would be used for something where you can see all the way thru, but I've been unable to figure out how to suspend things in that manner. Instead, I used it as a regular frame.
Unfortunately the frame did not include mounting hook or notch. It has to simply stand up on the edge of the frame. Hopefully it does not get knocked over and broken any time soon. (fingers crossed)
Ray (letumgo)----<°))))))><
http://www.flytyingforum.com/index.php? ... er=letumgo
"The world is perfect. Appreciate the details." - Dean
http://www.flytyingforum.com/index.php? ... er=letumgo
"The world is perfect. Appreciate the details." - Dean
