Framing Flies - DIY Craft Project

Moderators: William Anderson, letumgo

User avatar
letumgo
Site Admin
Posts: 13346
Joined: Sat Feb 21, 2009 7:55 pm
Location: Buffalo, New York
Contact:

Framing Flies - DIY Craft Project

Post by letumgo » Sun Feb 15, 2015 1:02 pm

My daughter gave me a set of 5"x7" picture frames for Christmas, and I am just getting around to playing around with them. I've wanted to try my hand at framing of flies. I decided to start with a set of three beautiful flies that Carl sent to me last year. The flies were part of his "Fade Series" flies, he had shown on the forum. The flies are beautiful (a detail lost in this series of photos).

Here are the items used for my framing project:
5"x7" picture frames
Heavy duty water color paper (it has a great bulky texture which I think enhances the look of the framed flies).
Fiskars paper cutter (stolen from my wife...shhhh...this thing has been great for making swap labels too...)
Image

Sharp needle, spool of Ultra Wire (size "Small"), finger nail clippers for cutting the wire, masking tape for securing the wire in place.
Image
Start by cutting a piece of water color paper to match the size of the rear panel of the frame.
Image
Next cut out a smaller section and plan out where the flies will appear on the paper.
Image
I wanted the flies to be raised off the back of the frame, in a gentle curve. This meant that I needed to cut the paper a little wider than the inside of the frame. This is definitely a bit of trial-and error part of the project. I started with a piece of paper that I knew would be too tall, and then trimmed small sections of it off, placing it into the frame to check the appearance, and repeating process until I was happy with the final curve.
Image
The flies are mounted to the paper with copper wire. The wire is inserted thru holes in the paper, bent outwards and taped into place. I used one wire thru the eye of the hook, and a second wire around the bend of the hook. The wires will hold the hooks securely in position, without obscuring or distracting from the beauty of the flies.
Image
I then created a small text box, crediting the flies to Carl "Old Hat" Sanders, and capturing the recipe of the flies.
Image
Components ready for framing.
Image
It is important to clean the inside and outside of the frame with window cleaner, before putting the pieces back together.
Image
The curved mount for the flies creates a pleasant effect, when seen in proper lighting. It creates a soft curved shadow, adding depth to the display.
Image
(this photo does not do it justice. I was trying to photograph the frame in bright sunlight to capture the rich color of the seal fur in the fly bodies, but the lighting is too harsh. The color is lost due to the high contrast).

Well, that was my grade school project for today. It was fun to play with a glue stick again, but it doesn't taste as good as the glue we had in kindergarten. :lol: :lol: :D
Ray (letumgo)----<°))))))><
http://www.flytyingforum.com/index.php? ... er=letumgo

"The world is perfect. Appreciate the details." - Dean
User avatar
William Anderson
Site Admin
Posts: 4569
Joined: Mon Feb 23, 2009 3:14 pm
Location: Ashburn, VA 20148
Contact:

Re: Framing Flies - DIY Craft Project

Post by William Anderson » Sun Feb 15, 2015 1:10 pm

I'm so glad you did this. Beautiful tech for mounting these flies and a nice set to frame. I like this arrangement method very much. You might also consider making room for a small name plate with Carl's signature mounted below the flies. Maybe the date as well.
"A man should not try to eliminate his complexes, but rather come into accord with them. They are ultimately what directs his conduct in the world." Sigmund Freud.
www.WilliamsFavorite.com
User avatar
letumgo
Site Admin
Posts: 13346
Joined: Sat Feb 21, 2009 7:55 pm
Location: Buffalo, New York
Contact:

Re: Framing Flies - DIY Craft Project

Post by letumgo » Sun Feb 15, 2015 1:20 pm

William - I agree. A signed name card/date would be a nice addition. I am hoping Carl continues to expand the Fade Series, so I could fill in the gaps with more flies. :D I've got room to collect them all. :D ;)
Ray (letumgo)----<°))))))><
http://www.flytyingforum.com/index.php? ... er=letumgo

"The world is perfect. Appreciate the details." - Dean
User avatar
tie2fish
Posts: 5072
Joined: Sun Feb 22, 2009 9:11 am
Location: Harford County, MD

Re: Framing Flies - DIY Craft Project

Post by tie2fish » Sun Feb 15, 2015 1:23 pm

Here's what I think ...

Image
Some of the same morons who throw their trash around in National parks also vote. That alone would explain the state of American politics. ~ John Gierach, "Still Life with Brook Trout"
User avatar
letumgo
Site Admin
Posts: 13346
Joined: Sat Feb 21, 2009 7:55 pm
Location: Buffalo, New York
Contact:

Re: Framing Flies - DIY Craft Project

Post by letumgo » Sun Feb 15, 2015 1:24 pm

:lol: :lol: :lol:

Thanks Bill. I got a good laugh out of that. I need to print that out and put it on our refrigerator. :lol: :lol: :lol:
Ray (letumgo)----<°))))))><
http://www.flytyingforum.com/index.php? ... er=letumgo

"The world is perfect. Appreciate the details." - Dean
User avatar
Old Hat
Posts: 4208
Joined: Sat Nov 14, 2009 12:24 am
Location: Where Deet is a Cologne
Contact:

Re: Framing Flies - DIY Craft Project

Post by Old Hat » Sun Feb 15, 2015 6:56 pm

Ray, I like the design of this display. It has some very nice features and stands out from others I have seen. I am a bit humbled that you used those for this display. I will have to send you some more to fish. :D
I hate it when I think I'm buying organic vegetables, and when I get home I discover they are just regular donuts.
http://www.oldhatflytying.com
zen leecher
Posts: 998
Joined: Fri Apr 12, 2013 5:11 pm
Location: Moses Lake, WA

Re: Framing Flies - DIY Craft Project

Post by zen leecher » Sun Feb 15, 2015 7:21 pm

Rikers boxes are another framing box to consider. Easy to use, provided it's not dry flies and cheap to buy.
User avatar
letumgo
Site Admin
Posts: 13346
Joined: Sat Feb 21, 2009 7:55 pm
Location: Buffalo, New York
Contact:

Re: Framing Flies - DIY Craft Project

Post by letumgo » Sun Feb 15, 2015 8:57 pm

Agreed. I've used Riker boxes for some of my streamers. I have a small pile of them tucked away in the corner of my tying desk.
Ray (letumgo)----<°))))))><
http://www.flytyingforum.com/index.php? ... er=letumgo

"The world is perfect. Appreciate the details." - Dean
User avatar
crazy4oldcars
Posts: 595
Joined: Fri May 22, 2009 5:26 pm
Location: SE Texas
Contact:

Re: Framing Flies - DIY Craft Project

Post by crazy4oldcars » Mon Feb 16, 2015 7:13 am

There'a just no end to your talents, is there, Ray? This would be fantastic, if I had my own space to put them in. A very good job.
As I remember it, the "school paste" had a wintergreen scent added to it. My friend in kindergarten was a paste eater. He convinced me to try it, but it wasn't sweet like candy, so he didn't make a convert of me. :roll: :lol: :lol:
User avatar
cassady
Posts: 189
Joined: Sat Jul 28, 2012 10:10 pm

Re: Framing Flies - DIY Craft Project

Post by cassady » Mon Feb 16, 2015 8:39 am

Ray,

Wonderful stuff! Thanks for posting this. I have made a few attempts at framing flies as well -- with similar frames, it seems.

In the spirit of sharing (and sponsored by a day off and frigid temperatures keeping me inside), I thought I might share some successes and failures.

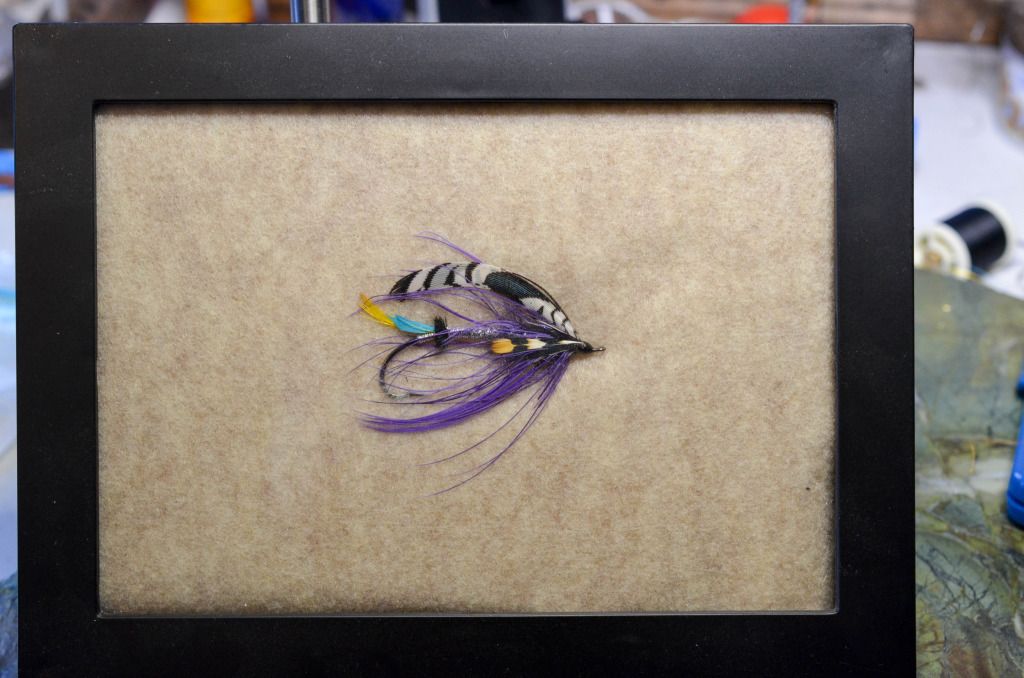
After a few failed attempts (fortunately not photographed, I settled upon this style:

Image
tied by Scott Bleiler

It's framed 'riker style,' upon a background of heathered felt. I got the felt at the craft store -- it's available in a variety of sizes and colors, and can be cut to fit the frame. As an added bonus, the fly can be affixed (at least partially) to the felt (there is also a loop of mono securing the eye, similar to what you did with the wire, but locked in with crazy glue).

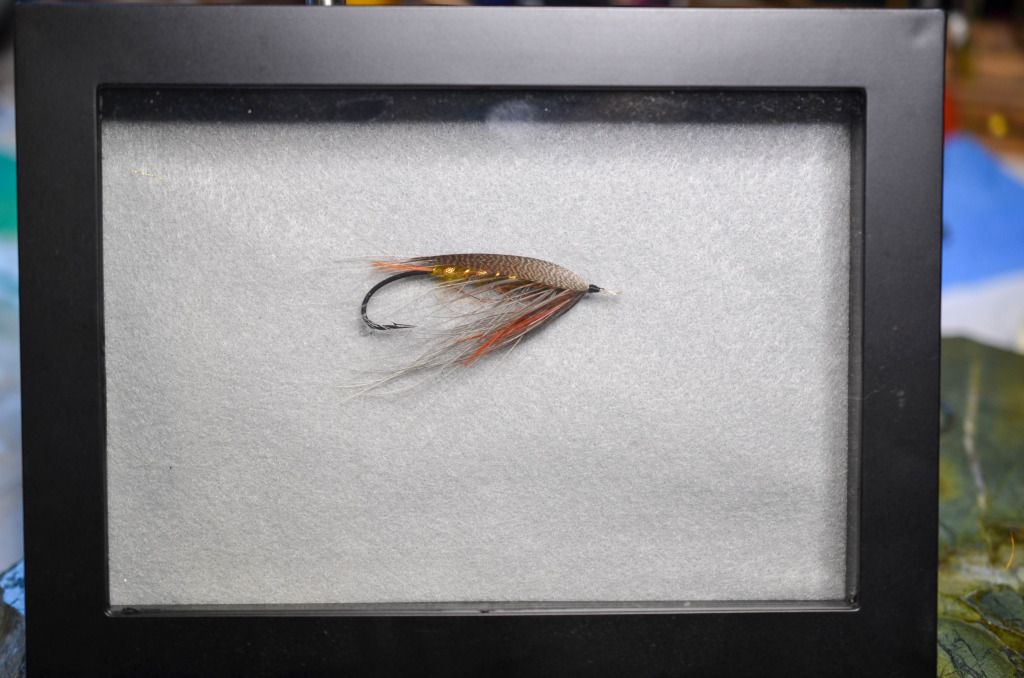
The last few I've done are slightly different:

Image
tied by Nick Pionessa

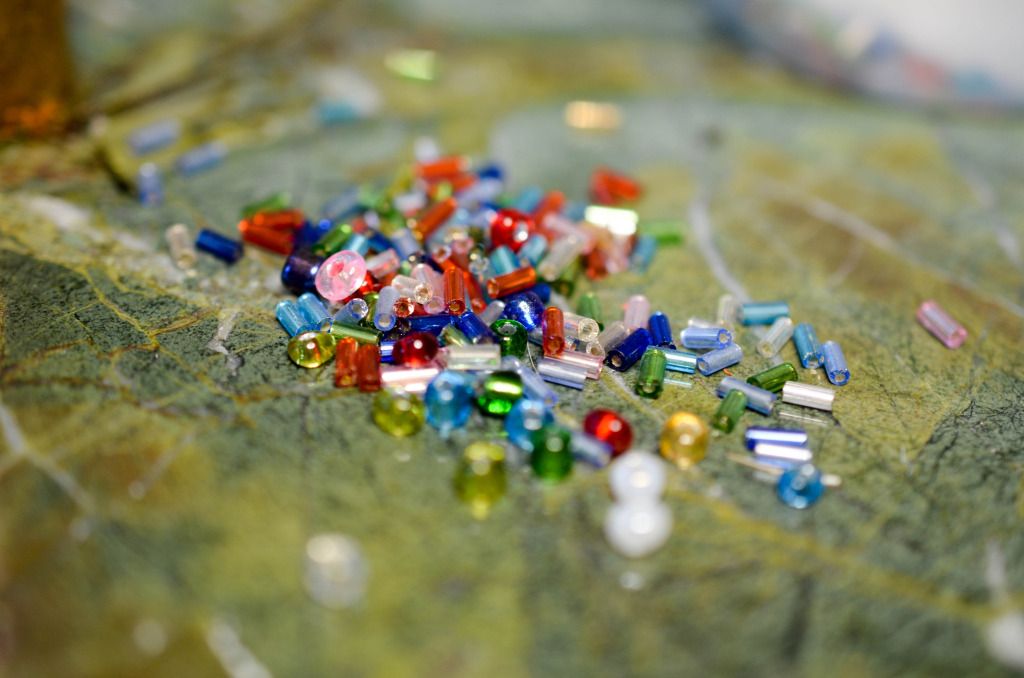
I don't know how clear it is in the photo, but there is more separation in this one between the background and the fly - it's more 'three-dimensional,' if that makes sense. A friend suggested using a short section of copper tubing (meant for tube flies); instead, I ran the mono used to affix the fly through small beads to prop up the fly. I think this style works better for hackled flies like flymphs and drys in particular.

I found that tubular shaped beads work well; this is what they look like:

Image

They're available (as is the felt) at any of the local craft stores. Alternatively, one could use regular beads, or thin metal or plastic tubing (like those for tube flies).

I'm curious to see others' creative ideas and solutions to mounting flies.
Post Reply