Making Wiggle-Tail Extensions
Posted: Tue May 01, 2012 8:29 pm
Because William asked...
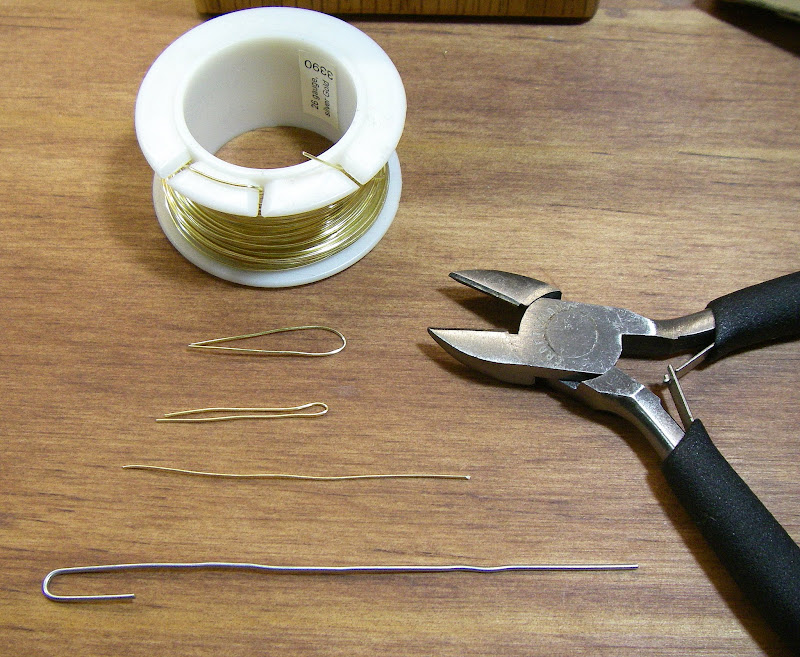
I just can't bring myself to chop up a perfectly good hook, to form wiggle tail extensions. I came up with a simple method of making wiggle-tail extensions out of craft wire. All you need is a standard paper clip, pair of wire cutters, some craft wire (26 gage works nicely) and a rotary vice.


Take a standard paper clip and straighten it out, leaving only the small hook intact. This will become the tool for holding the wire as it is being twisted. The wire of the paper clip is a nice diameter for forming the circular loop at the end of the wiggle tail.

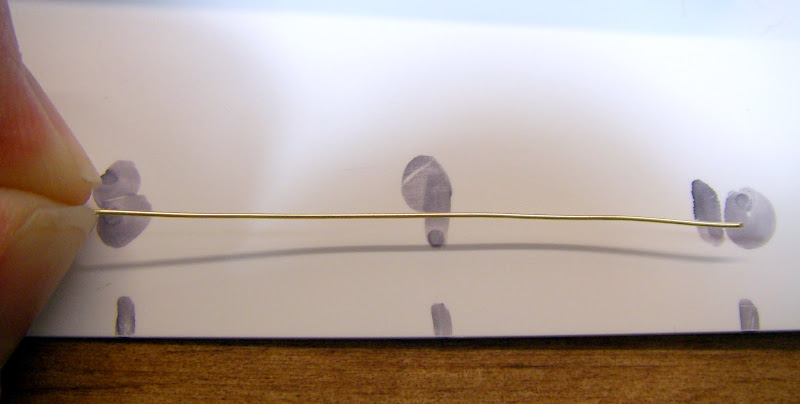
Cut the craft wire into sections roughly two inches (~50 mm) long.

Fold the section of craft wire in half, and then clamp the ends of the wire into a rotary vice. Insert the U-bend of the paper clip tool into the loop of the craft wire.

Rotate the head of the vice, while holding the paper clip tool stationary. Keep twisting until the twists in the craft wire form roughly a 45° angle with the centerline of the wiggle tail. You will begin to feel some resistance when the wraps are are tight enough. Over twisting will cause the eye of the wiggle tail to begin bending to the side.
(you could tye the rear half of the fly at this point if you wanted to)
Repeat process to form additional wiggle tails for tying.

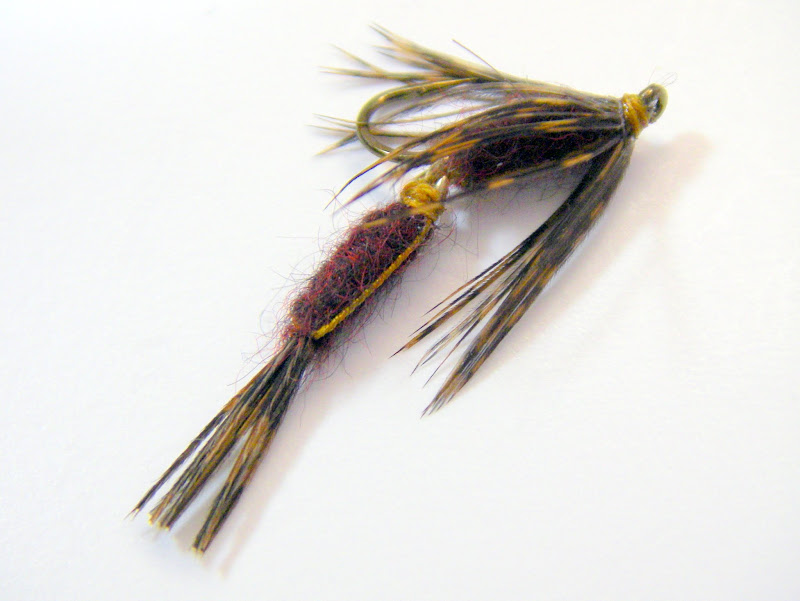
Here is a fly created with the wiggle tail extension.
I use a small loop of black beading cord to join the wiggle tail extension to the hook. You can buy the stuff in the jewlery section of your local JoAnne Fabrics/Walmart/Michael's/etc. The stuff comes on little spools that look like this.

This stuff is very flexible and yet very strong. I think the breaking strength is in the 20 to 30 lb range.
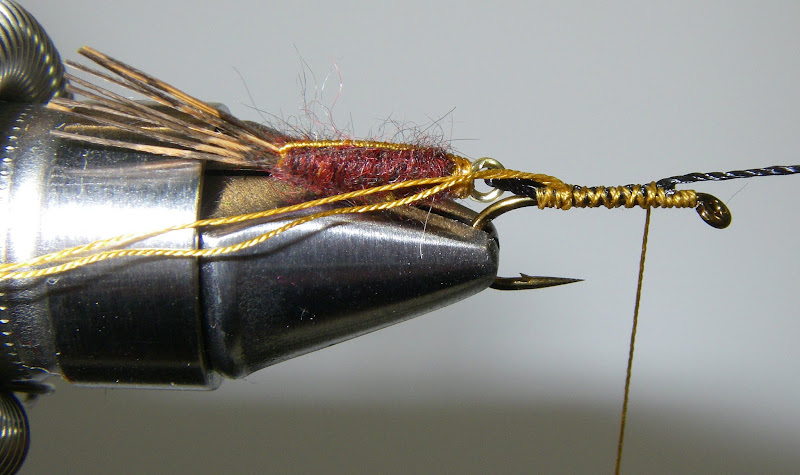
Here are a couple photos showing the intermediate step.


NOTE - Small cotterpins make nice wiggle tail extensions too.
I just can't bring myself to chop up a perfectly good hook, to form wiggle tail extensions. I came up with a simple method of making wiggle-tail extensions out of craft wire. All you need is a standard paper clip, pair of wire cutters, some craft wire (26 gage works nicely) and a rotary vice.
Take a standard paper clip and straighten it out, leaving only the small hook intact. This will become the tool for holding the wire as it is being twisted. The wire of the paper clip is a nice diameter for forming the circular loop at the end of the wiggle tail.
Cut the craft wire into sections roughly two inches (~50 mm) long.
Fold the section of craft wire in half, and then clamp the ends of the wire into a rotary vice. Insert the U-bend of the paper clip tool into the loop of the craft wire.
Rotate the head of the vice, while holding the paper clip tool stationary. Keep twisting until the twists in the craft wire form roughly a 45° angle with the centerline of the wiggle tail. You will begin to feel some resistance when the wraps are are tight enough. Over twisting will cause the eye of the wiggle tail to begin bending to the side.
(you could tye the rear half of the fly at this point if you wanted to)
Repeat process to form additional wiggle tails for tying.
Here is a fly created with the wiggle tail extension.
I use a small loop of black beading cord to join the wiggle tail extension to the hook. You can buy the stuff in the jewlery section of your local JoAnne Fabrics/Walmart/Michael's/etc. The stuff comes on little spools that look like this.
This stuff is very flexible and yet very strong. I think the breaking strength is in the 20 to 30 lb range.
Here are a couple photos showing the intermediate step.
NOTE - Small cotterpins make nice wiggle tail extensions too.